Looking for easy diy sewing projects you can finish in a weekend? Start with straight-seam makes such as totes, pouches, scrunchies and pillow covers: they need little fabric, basic stitches and no pattern fitting.
| Item | Value |
|---|---|
| Simplicity’s standard seam allowance | 5/8″ (1.5cm) |
| Reduced seam allowance for very small items | 3/8″ or 1/4″ |
| Lightweight cotton for a simple market tote | 4-6 oz |
| Mid-weight fabric for everyday totes | 8-12 oz |
| Fabric for a heavy-use tote | 12 oz duck canvas |
These figures come from a Simplicity-published seam allowance guide and a quilt shop’s tote fabric guide. They can change, so check the sources before you rely on them. This site is independent and not connected to either company.
What makes a sewing project easy?
An easy project is mostly straight lines. If you can sew a straight seam, press it and turn a piece right side out, you already have the skills for most of the projects below.
Look for these traits when you pick something to make:
- Rectangles instead of curves, so cutting and sewing stay simple.
- Few pieces, ideally one outer layer and one lining.
- Forgiving fit: bags, covers and baskets do not need to match a body measurement.
- A finish you can see quickly, which keeps you motivated through a weekend.
If you are brand new to the machine itself, read sewing for beginners first. It covers threading, tension and the first stitches, so the projects here feel less like guesswork.
What you need before you start
You do not need a full sewing room. A basic machine, sharp scissors or a rotary cutter, pins or clips, a ruler, an iron and thread will cover nearly everything in this guide.
Choose a fabric that behaves
Smooth, medium-weight cotton is the easiest fabric to learn on. It holds a crease when pressed, does not slide around under the needle and rarely frays badly. Slippery satins and stretchy knits are best saved for later.
Weight matters most for bags. One quilt shop’s guide says a lightweight 4-6 oz cotton is perfect for a simple market tote, while a 12 oz duck canvas suits a bag that has to take a beating. The same guide calls mid-weight fabric, 8-12 oz, the sweet spot for most everyday totes.
Lighter fabrics will usually need interfacing for structure. Fusible interfacing is ironed onto the back of the fabric and makes a thin cotton feel more like a sturdy one.
Know your seam allowance
The seam allowance is the strip of fabric between the stitching line and the cut edge. A Simplicity-published guide states that its standard seam allowance is 5/8″ (1.5cm), and that very small items often use 3/8″ or 1/4″ instead.
Many bag and home-decor tutorials choose their own allowance, so read the instructions before you cut. Follow the allowance specified for each seam; different seams may require different allowances.
Bags and pouches to sew first
Bags are the classic starter project because they are forgiving and useful the moment you finish them. Each one below teaches a different skill.
Tote bag
A tote is two rectangles, two straps and a lining. If you want a full walkthrough, read how to make a tote bag for cutting, strap attachment and boxed corners.
Choose a main fabric with some body, such as a mid-weight cotton or a canvas. If you use a lighter print, fuse interfacing to it so the bag holds its shape when it is full. Make the straps longer than you think you need, because you can always trim them, and sew a small box or square of stitching where each strap joins the bag. That reinforcement helps reduce the risk of straps tearing away.
Boxed corners give the bottom of the bag depth. You sew the side and bottom seams, flatten each corner into a triangle, then stitch straight across it. The wider the stitched line from the point, the deeper the base. Try a quick test with scrap fabric first so you can see how the depth changes before you commit to your real bag.
The skills you pick up are sewing strong straps, reinforcing stress points and topstitching a clean top edge. These carry over to almost every other bag you will make later.
Drawstring bag
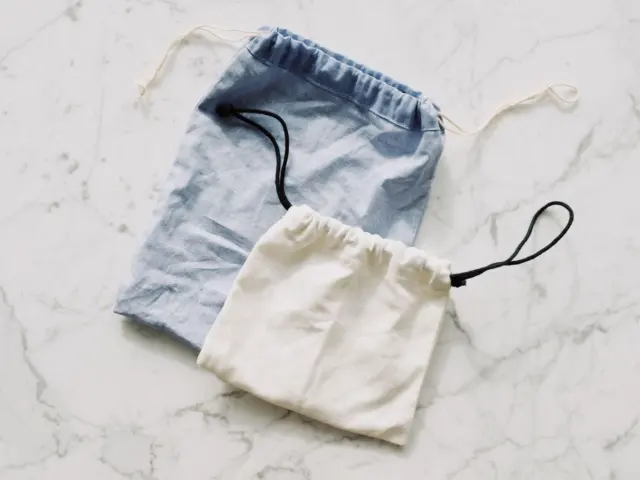
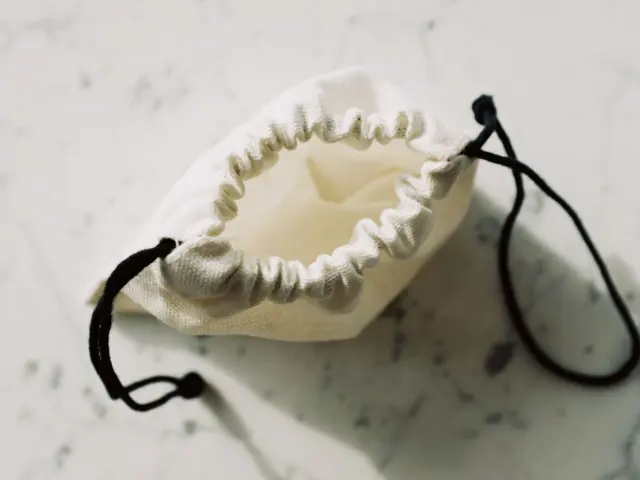
This is perhaps the quickest bag of all. You fold a rectangle, sew the sides, make a channel at the top and thread a cord through. The guide on how to sew a drawstring bag shows how to do it without any hardware.
It suits shoe bags, toy bags and laundry sacks, and it is an easy place to practise a neat casing, which is a tunnel of stitched fabric that holds the cord.
Zipper pouch
A zipper scares many beginners, but a pouch uses a short, straight zipper and no curves. Follow how to sew a zipper pouch for a lined version with a tidy interior.
Use a zipper foot so the needle can run close to the teeth. Once you can sew a pouch, pencil cases, makeup bags and travel organisers are all within reach.
Tips that apply to every bag
Cut the lining and outer fabric to the tutorial’s specified dimensions; they may differ. Stack the layers, smooth them flat and cut with a rotary cutter or sharp shears so the edges line up.
- Press the top edge of both layers before you join them, so the opening folds cleanly.
- Backstitch at the start and end of every seam to lock the thread.
- Clip bulky corners so they turn out sharp, taking care not to cut the stitches.
- Use a point turner or a blunt pencil to push corners out gently.
- Topstitch close to the edge for strength and a crisp finish.
If a seam goes wrong, do not panic. A seam ripper is the sewist’s best friend, and unpicking a few stitches is quicker than living with a crooked bag.
Home projects that make a room feel finished
Soft furnishings are a good next step. The pieces are flat and square, and a small mistake rarely shows once the item is in use.
Pillow cover
An envelope-back pillow cover has no zipper, and the back panels simply overlap. The guide on how to make a pillow cover covers sizing the cover slightly smaller than the insert so it looks full.
This is a great way to practise matching fabric edges and pressing seams flat. It is also an easy one to repeat in different fabrics as the seasons change.
Fabric basket
A fabric basket gives you a first taste of working with a stabiliser. The guide to how to make a fabric basket explains how an outer layer, a lining and a stiffener create a shape that stands on its own.
Baskets are perfect for yarn, toys, bathroom supplies or desk clutter. They also use up leftover fabric, which makes them a thrifty way to build skills.
Quilted potholder
A potholder introduces layering and quilting in a very small format. The walkthrough on how to make a quilted potholder covers the layers, the quilting lines and the binding.
Because it is small, you can finish one in an evening. Choose heat-resistant batting designed for the purpose, and always check the label before using a potholder near heat.
Small projects for gifts and accessories
When you only have a short stretch of time, scraps and small patterns are your friend. These projects use very little fabric, so mistakes cost almost nothing.
Scrunchie
A scrunchie is a tube of fabric with elastic threaded through it. The tutorial on how to make a scrunchie shows how to close the opening neatly by hand or by machine.
It is ideal for practising a long straight seam and for using up pretty remnants. A handful of scrunchies also make a quick present.
Reusable fabric gift bags
Fabric gift bags replace wrapping paper and can be used again and again. You can learn how to make reusable fabric gift bags in different sizes, with ribbon or cord closures.
They are a good use for holiday prints and leftover pieces. Once you have made a few, you will find you can cut them to fit almost any gift.
Other quick ideas
- Fabric coasters made from two squares sewn right sides together and turned.
- Simple napkins with mitred or straight-hemmed edges.
- Eyeglass cases with a lining and a soft interfacing.
- Produce bags from light, breathable fabric.
- Pet bandanas, which are triangles with a simple hem.
Choosing projects by skill
If you like to progress in clear steps, group the projects by what they teach. This keeps each new make just a little harder than the last, which is how confidence grows.
- Straight seams only: scrunchie, drawstring bag, coasters, napkins.
- Straight seams plus turning and topstitching: tote bag, pillow cover, gift bags.
- Layers and shaping: fabric basket, quilted potholder.
- New hardware: zipper pouch, which introduces the zipper foot.
There is no rule that says you must go in order. Pick whatever you will actually use, because a project you want is a project you will finish.
Setting up your space
A small, comfortable corner is enough. Put the iron and ironing board within reach of the machine, since you will move between the two constantly. Good light makes a big difference, so add a desk lamp if your room is dim.
Keep a small dish for pins, a bin for thread scraps and a labelled box for leftover fabric. Tidy habits save time and keep sharp tools from getting lost in a pile of material.
Thread, needles and tools that help
Good basics make easy projects easier. You do not need the most expensive versions, but you do want items that are sharp, clean and suited to the fabric in front of you.
Thread and needles
An all-purpose polyester or cotton thread in a colour close to your fabric works for nearly everything here. For heavier fabrics such as canvas, switch to a larger needle so it pierces the layers without skipping stitches. Change your needle often, because a dull one can snag threads and leave puckered seams.
Use a slightly longer stitch for topstitching and for thick layers. A shorter stitch suits fine cotton and small projects such as scrunchies, where seams need to stay neat in a tiny space.
Cutting and marking tools
- A rotary cutter and mat for straight, accurate edges.
- Sharp fabric shears kept only for cloth, never paper.
- A clear quilting ruler for measuring squares and rectangles.
- A washable marker or chalk for transferring lines.
- A seam ripper for fixing slips without damaging the fabric.
Accurate cutting is the hidden secret of easy sewing. If your pieces are exactly the right size and the corners are square, the machine does most of the work, and the finished project looks neat without much effort.
Caring for your finished makes
Wash a new bag, basket or cover the way you would wash the fabric itself, and check any batting or stiffener before you launder it. Pre-washing your cotton before you sew is a simple way to avoid surprise shrinking later. Lay baskets and pouches flat to dry so they keep their shape, and press them with a warm iron once dry.
How to plan a weekend of sewing
A weekend is plenty of time for one larger project and one small one. The trick is to prepare before you sew, because cutting and pressing often take as long as stitching.
Try this order:
- Pick one project and read the full instructions before you buy anything.
- Prewash, dry and press washable fabric according to its care instructions to reduce later shrinkage.
- Cut every piece in one sitting, and label them if the shapes look alike.
- Test your stitch length and tension on a scrap of the same fabric.
- Sew in short stretches, pressing each seam before the next one.
- Finish with a trim of loose threads and a final press.
Pairing projects helps. If you are making a tote bag, sew a matching zipper pouch from the offcuts. If you are making a pillow cover, a basket from the same print will pull the look together.
Common mistakes to avoid
- Skipping the press. Flat, crisp seams make every project look more professional.
- Changing seam allowance halfway through, which leaves pieces that no longer match.
- Using the wrong needle for the fabric. Heavier canvas needs a sturdier needle than light cotton.
- Forgetting to leave a turning gap in the lining, then having no way to flip the project right side out.
- Rushing curves. Slow down and let the machine feed the fabric.
Pressing, pinning and clipping
Three small habits separate a tidy project from a messy one. Press each seam before you cross it with another, pin or clip the layers so they cannot shift, and clip into curves or trim corners so they sit flat when turned.
Wonder clips are handy for thick layers such as canvas, because pins can be hard to push through. Whichever you use, remove pins before the needle reaches them to protect the needle and the machine.
Making the most of scraps
Every project leaves offcuts, and those pieces are free practice material. Keep a box of the larger leftovers and use them for test seams, small pouches, patchwork coasters or the linings of other bags.
Cutting sensibly also reduces waste. Lay out your pieces before cutting, place the largest shapes first and fit smaller ones around them, the way you would pack a suitcase. Doing this on a large table also helps you check that the pattern direction runs the way you want on every piece.
Where to go after your first projects
Once these feel comfortable, you will want to add a new skill each time. Zippers, pockets, piping and bias binding are all natural next steps.
Clothing is the next big area for many sewists. Small garments are a gentle way in, and the guide to how to sew kids clothes explains how little fabric and fitting they need compared with adult wear.
Keep a notebook with your fabric choices, stitch settings and what you would change next time. After a few projects you will have your own reference, which is far more useful than a pile of loose tutorials.
Frequently asked questions
What is the easiest thing to sew for a beginner?
Show answer
A drawstring bag or a scrunchie. Both use straight seams, small amounts of fabric and no fitting, so you see a finished result quickly.
What fabric should I use for easy sewing projects?
Show answer
Choose a smooth, medium-weight cotton. Woven cotton is generally stable and easy to press, although it can stretch on the bias. Add interfacing if the fabric is light and the project needs shape.
Do I need a pattern?
Show answer
Not for most of the projects here. Many are rectangles you can measure and cut yourself, and the linked tutorials give the dimensions you need.
What seam allowance should I use?
Show answer
Use whatever the instructions specify. A Simplicity-published guide gives 5/8″ (1.5cm) as its standard, with 3/8″ or 1/4″ for very small items. Follow the allowance specified for each seam.
Can I finish a project in one weekend?
Show answer
Yes, if you choose small projects and prepare first. Cut everything in one session, press as you go and avoid starting something with many layers or a zipper unless you have the time.