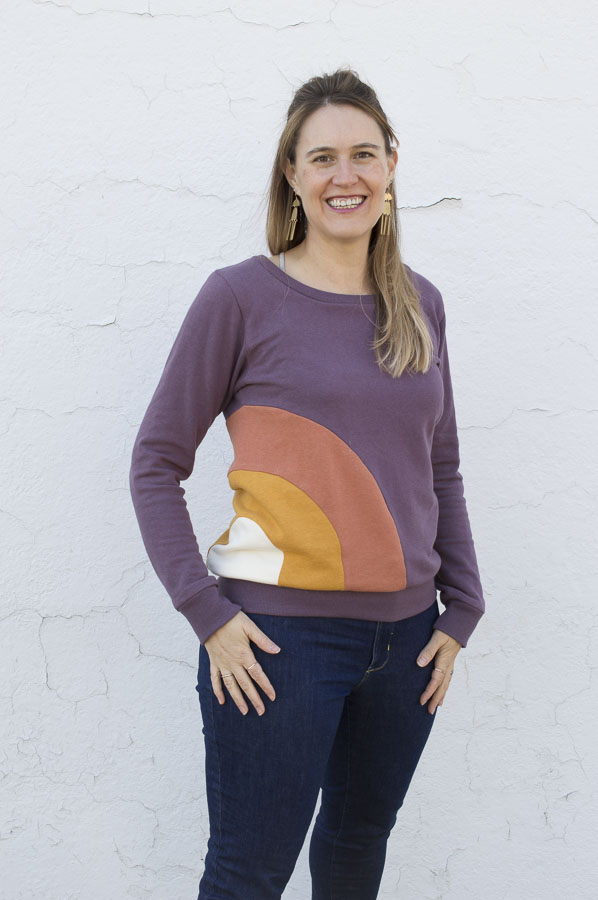
Did you know I spent the first few years of my life on an organic farm in rural Minnesota? Ah, yeah. My parents were total hippies in the 70s and after inheriting a conventional farm at marriage they decided to go full-70s hippy love and transfer it to organic. It wasn’t, however, their destiny nor was it their educational background so it didn’t work out. Luckily for me, though, I got those years running with the chickens and trying to befriend feral cats, eating organic vegetables and mourning the loss of many a farm dog. I also had a fabulous hippie child wardrobe including striped tee shirts and pink corduroy pants. My mom, too, was always styling in her tight scoop-neck tees and high waisted, wide leg jeans. It’s a style near and dear to my heart and the inspiration behind this Rainbow Hippie Child Sweatshirt.
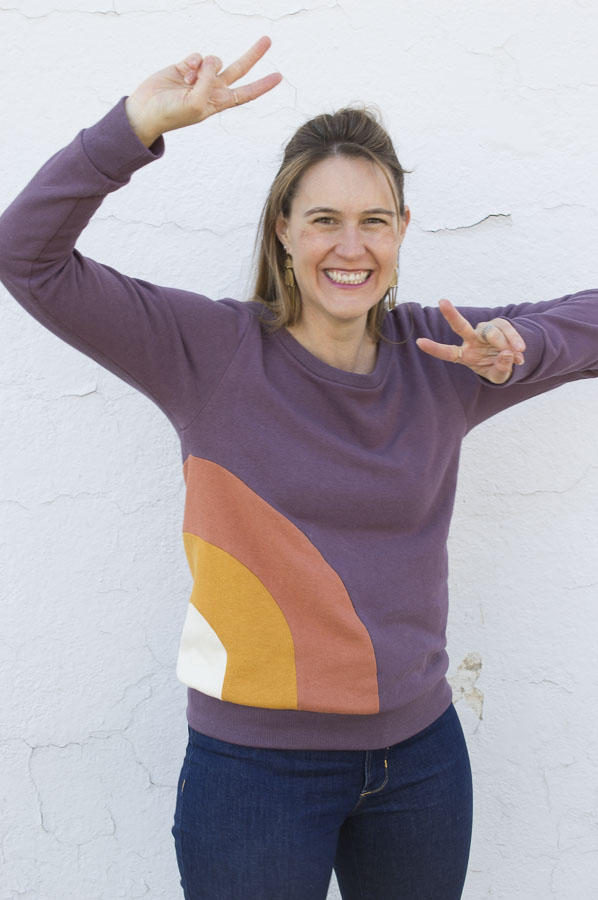
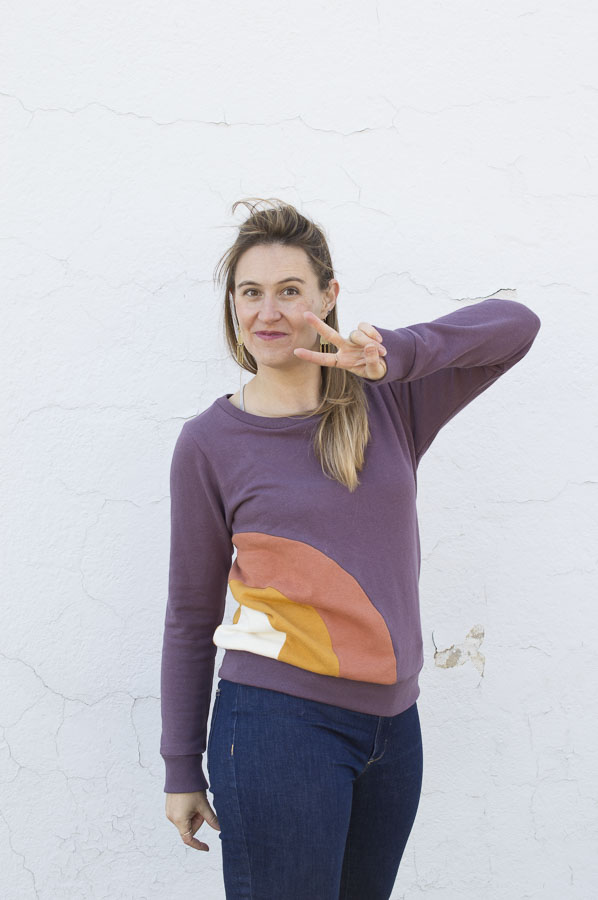
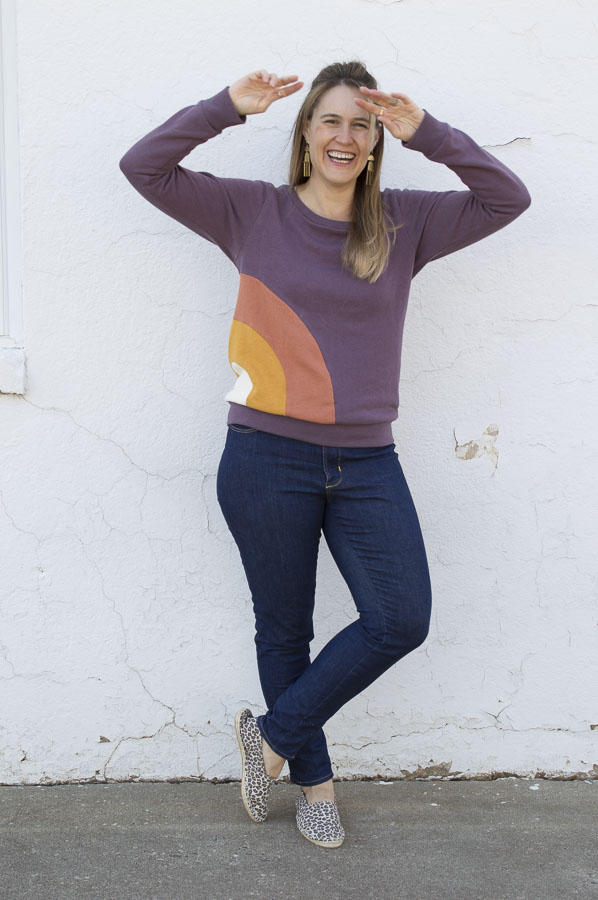
You guys, I am so proud of this sweatshirt. I have been dreaming and scheming about how to create this, my ideal rainbow hippie child sweatshirt for a while now. AND HERE IT IS! In the flesh. I am never taking it off. Truthfully, though, now that I’m quarantined and staying at home all the time…I am actually living in it.
Let me walk you through the details in case you want to release your inner hippie child. It’s, frankly, a good time to do just that.
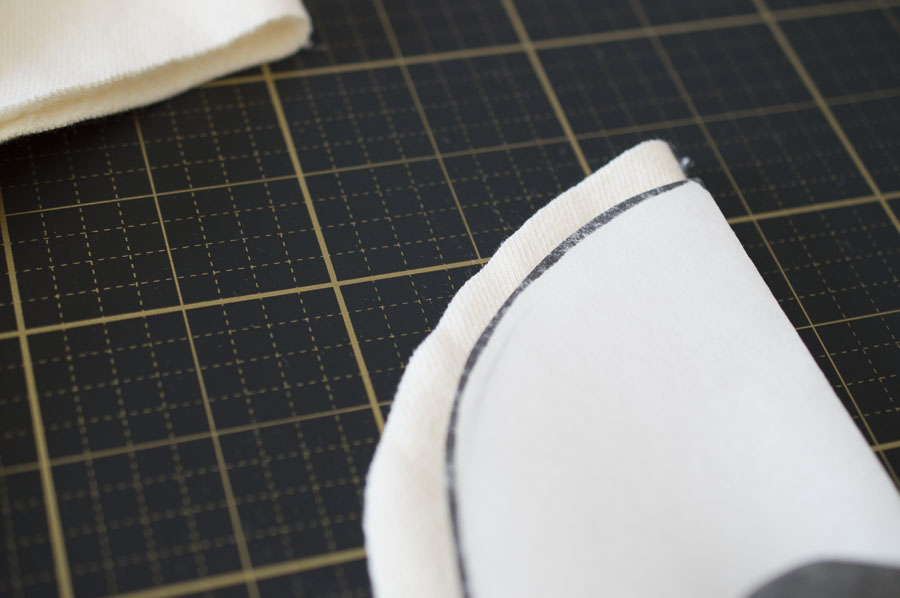
+ I started with the Halifax Hoodie from Hey June Handmade as a base. I used VIEW D, which is intended as a funnel neck. To get the look I wanted, I omitted the funnel neck, altered the neckline by adding 2″ upward for a more boatneck style and decreased the length of the torso by 2″ to make it shorter. (I am a big fan of this pattern, check here for the time I exaggerated the neckline!)
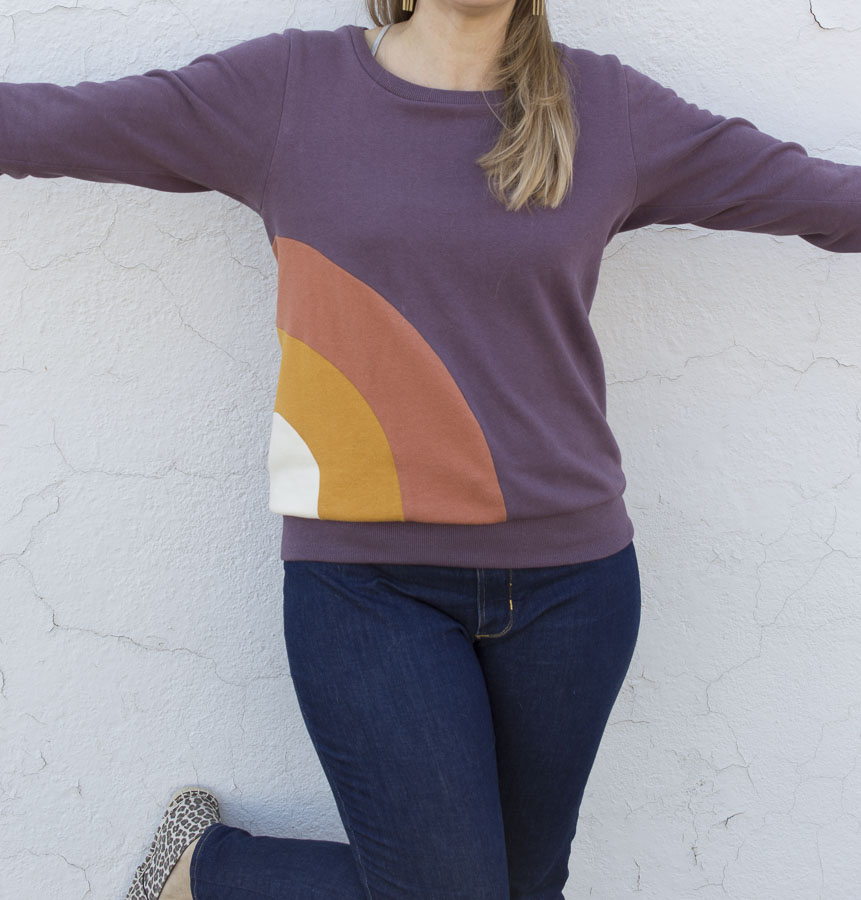
+ For Fabric, I used a Bamboo Cotton sweatshirt fleece from Stonemountain & Daughter Fabrics in Thistle, Sienna, Saffron, and Ivory. The unconventional rainbow colors reminded me of my childhood so much and the fabric is insanely soft. It’s like wearing a hug.
I began by drawing a half-rainbow in the size I wanted it on the front of my body. Then, I folded my paper and drew the other half so it was exactly symmetrical. I wanted to see how the rainbow fit across the side of my body, which is why I created the full rainbow. It isn’t necessary for construction of the sweatshirt, though. While cutting, you cut on the fold. You will see what I mean.
I don’t yet have an actual digital pattern of this (If there is enough interest I will update and add one to this post). Here are the overall dimensions if you want to draw your own:
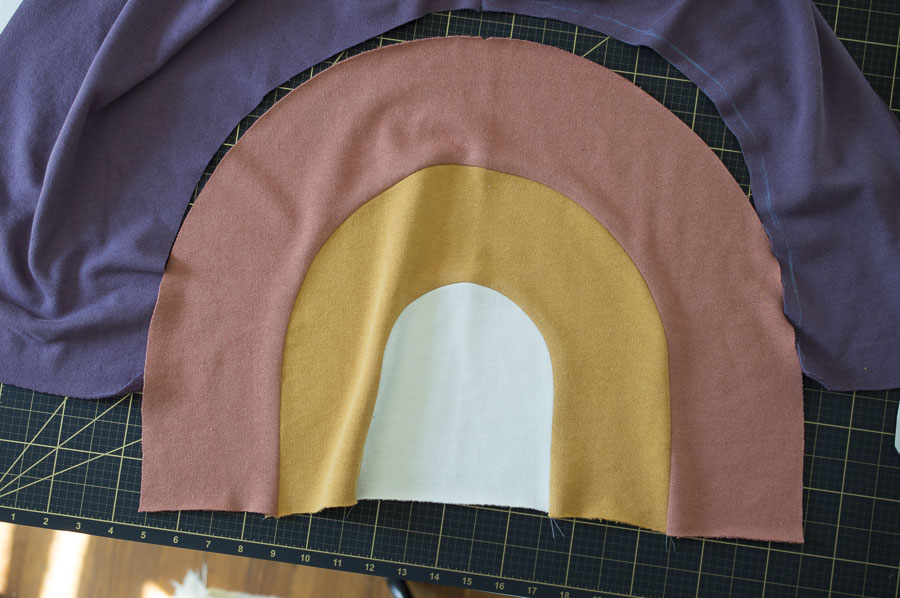
- The base ray is 6″ across and 6 5/8″ tall
- The second ray is 3.75″ across wide (as in, it is a 3.75″ sized stripe)
- The final ray is also 3.75″ wide.
- The entire rainbow sits 20.5″ wide and about 14″ tall. It’s really big!
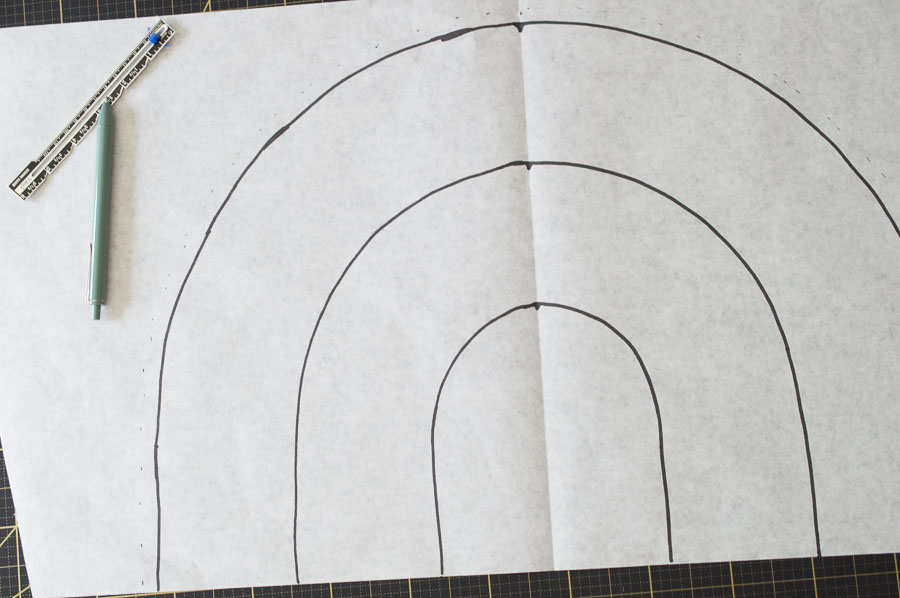
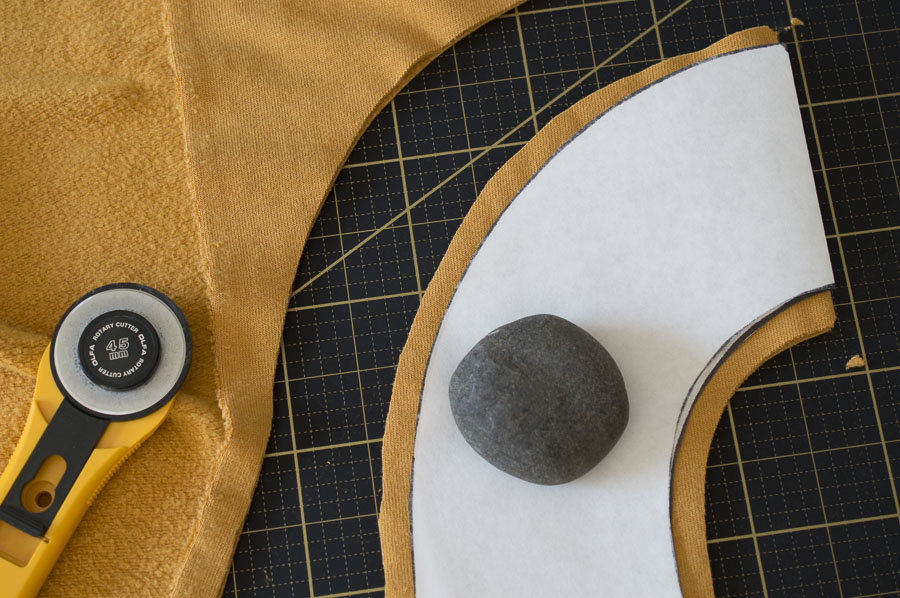
Cut out each ray of the rainbow pattern. Note: I added a 3/8″ seam allowance to the top of the last ray just because I could add the seam allowance there without any problem. The remaining seam allowances are added on the spot, as you will see.
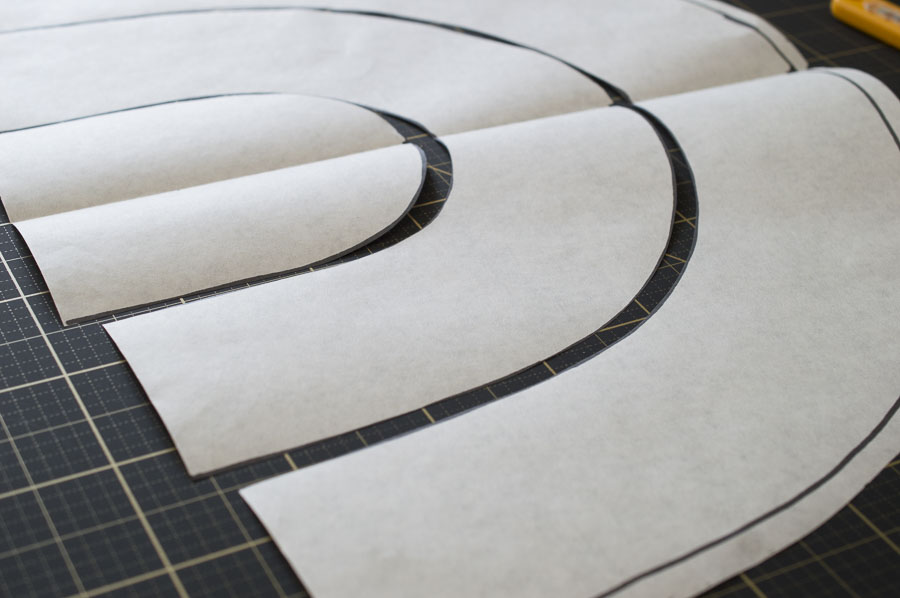
CUTTING
Fold the paper pattern in half at the middle fold and place each one on a fold of the fabric. Remember, you add the necessary seam allowance AS YOU CUT! So, before you cut out each piece, you need to be sure you’ve the correct seam allowance. You only need seam allowance on the curves, it’s not necessary for the bottom.
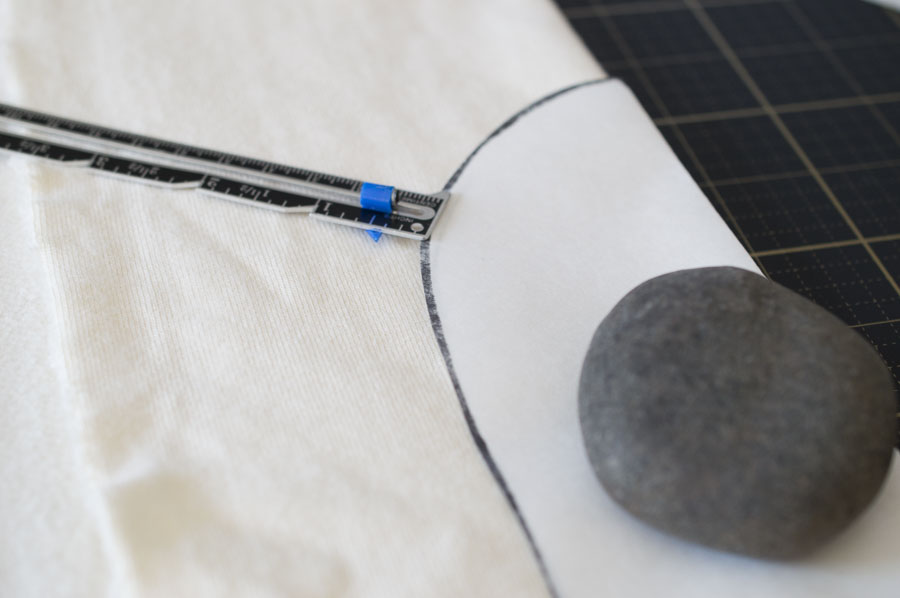
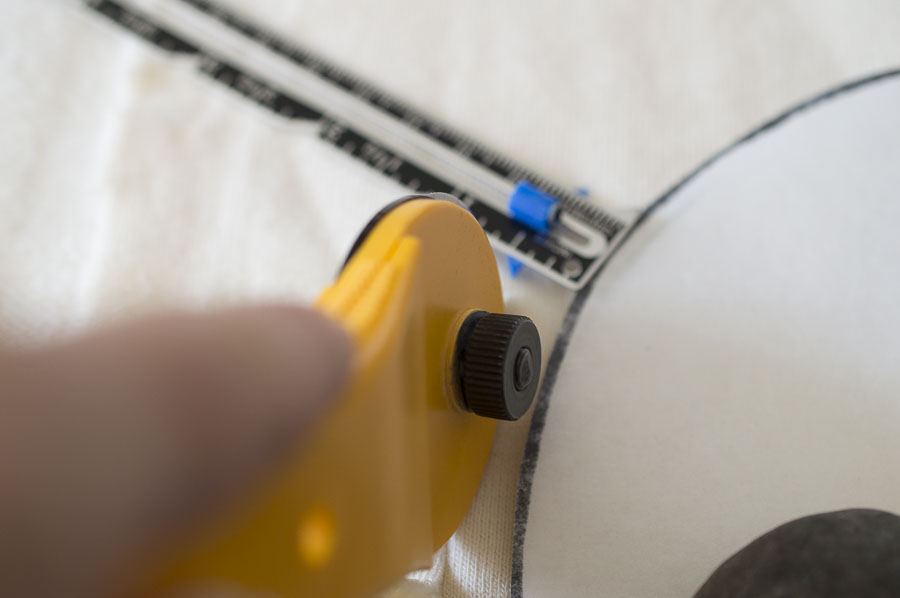
Quick tip: The black knob of the 45mm Olfa rotary cutters measure nearly 3/8″. You can switch your cutter around and cut so the black knob grazes the edge of the pattern and you’ve got an instant 3/8″ seam allowance! Isn’t that fabulous!
Go ahead and cut out your fabric with the added 3/8″ seam allowance at the top of the bottom ray of the rainbow.
Snip a small notch at the middle point of the bottom ray to make the mid-way point.

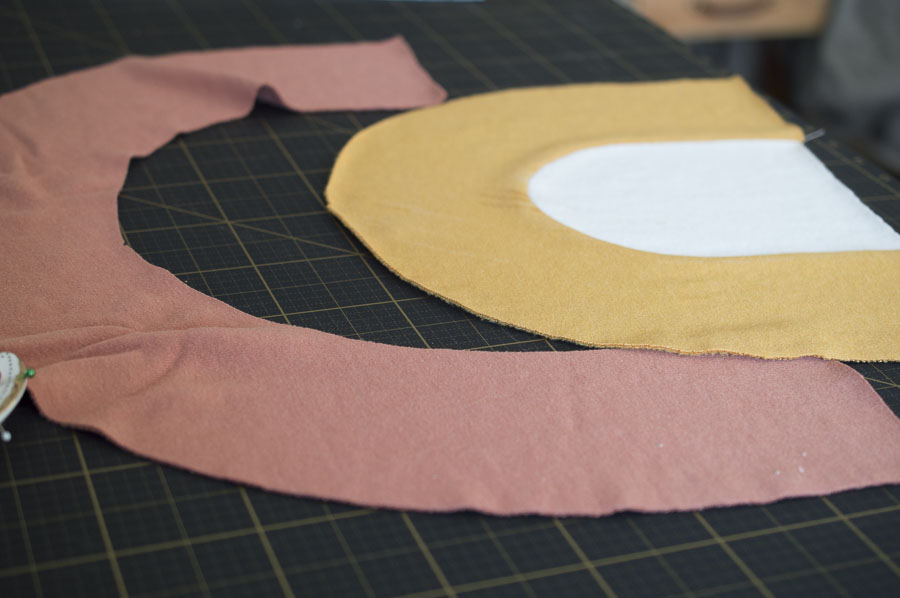
Cut each ray of the rainbow the same way, adding 3/8″ seam allowance to the top AND bottom of the remaining rays. Snip a middle notch at top and bottom as well, as pictured.

SEWING
Once it is all cut out, start constructing the rainbow.
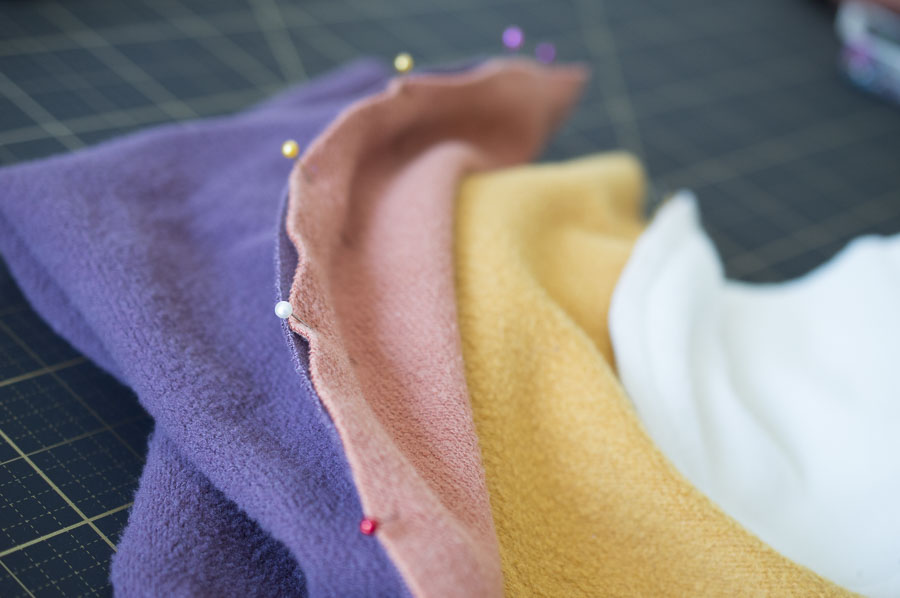
Begin by matching the bottom notch of the second (saffron) ray RIGHT SIDES TOGETHER with the top notch of the bottom (ivory) ray.
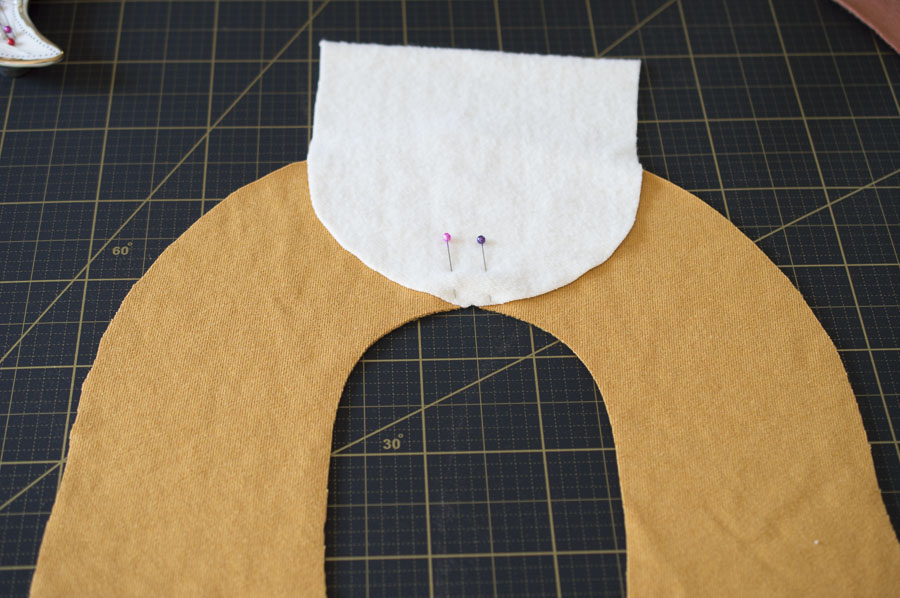
Match the rest of the edges with each other, working a small bit at a time from the middle down one side at a time. Be careful not to stretch the fabric as you go. It should look like a wavy mess like the picture below.
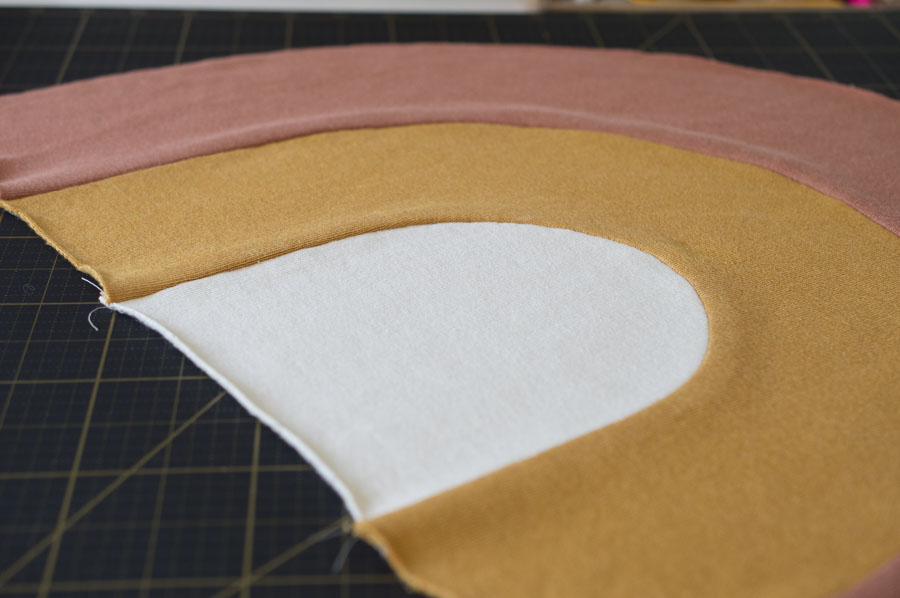
Stitch in place at 3/8″ seam allowance and press with an iron afterward.
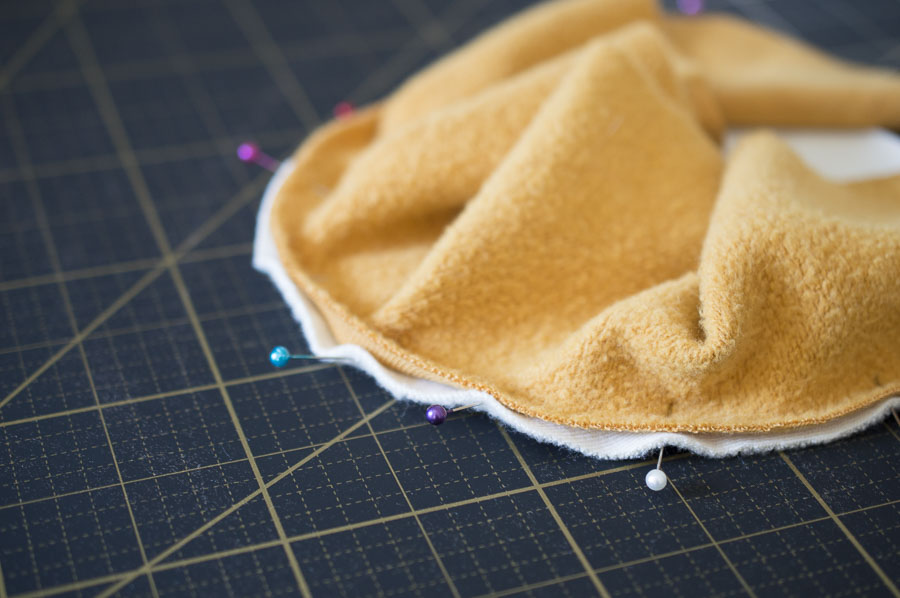
Repeat the same process for the outside (Sienna) ray of the rainbow, beginning by matching the bottom notch of the top ray of the rainbow with the top notch on the middle (saffron) ray of the rainbow. I know these words kind of sound like technical nonsense but they should be semi-intuitive as you work.
Once it is pinned in place, stitch with a 3/8″ seam allowance.

Press with an iron once you are done. Isn’t it bea-ou-tiful!!!!
Be sure to stop and admire your happy work!

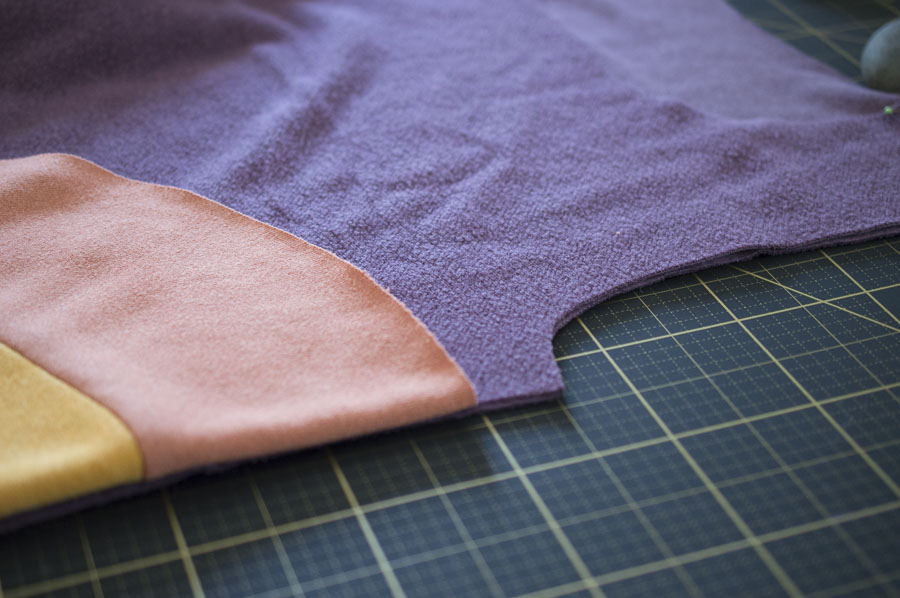
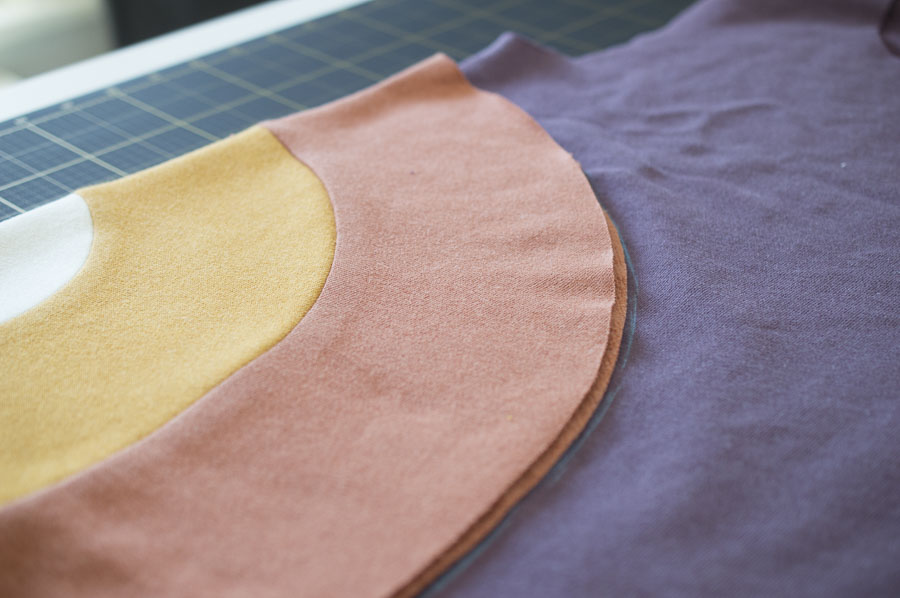
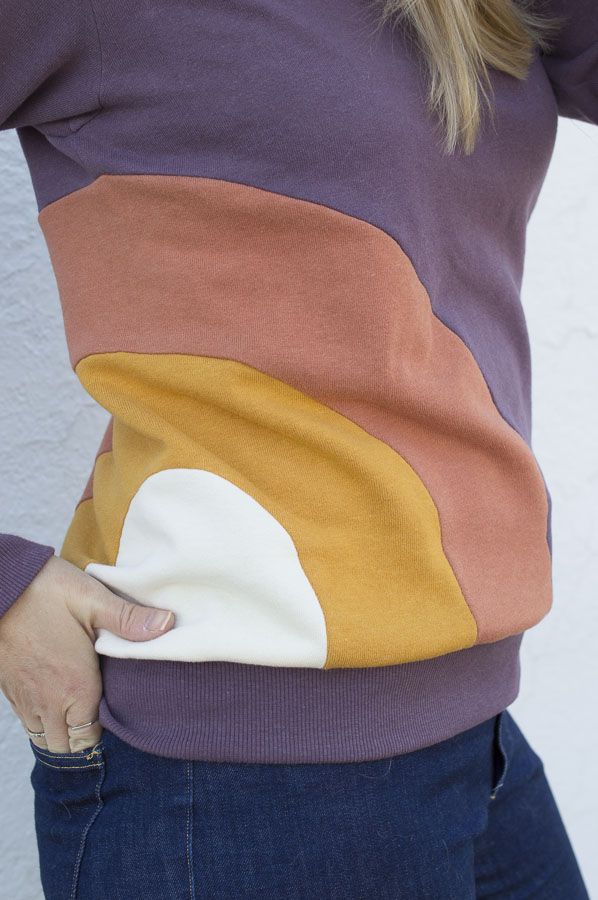
Cut the front, back, sleeves, waistband, cuffs and neckband needed for the sweatshirt as instructed in the pattern. I used matching rib knit for my cuffs, waistband and neckband, also available at Stonemountain and Daughter.
Sew both shoulder seams as directed in the pattern. Before sewing any sleeves on or any side seams, fold the rainbow in half and place it along one side seam aligning the bottom of the rainbow with the bottom of the sweatshirt. This is the time to decide which side of your body you want your rainbow to be on!
Using the length of the rainbow, determine how much of the side seam needs to be stitched up. You want to pin up to the armpit from the point where the top of the rainbow hits.
Add the 3/8″ seam allowance down (toward the hem) from that pin and sew to THAT POINT ONLY. Only sew ONE SIDE of the sweatshirt at this time.
Place the folded rainbow back up against the side you just stitched, lining everything up evenly front and back.
Trace the perimeter of the rainbow onto the sweatshirt.
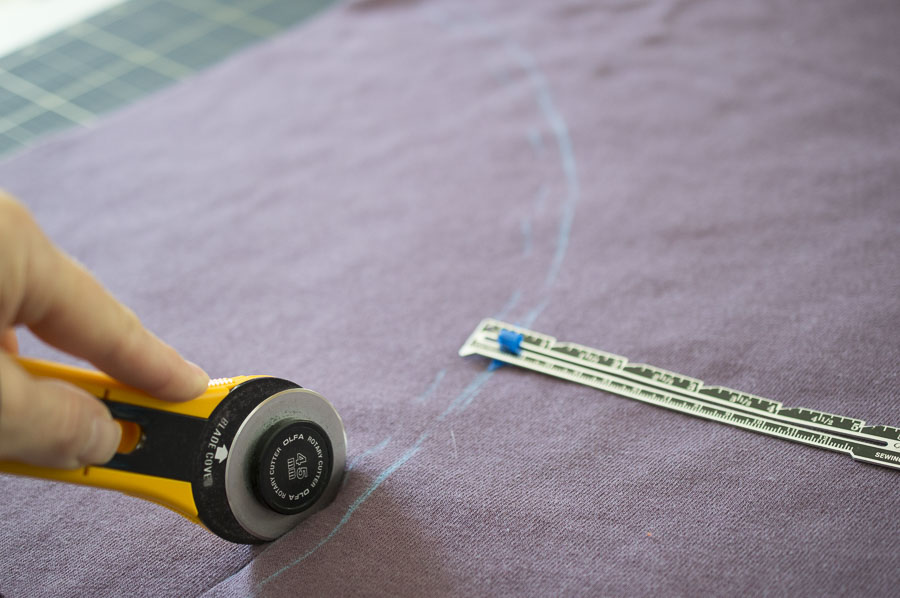
Remove the rainbow and add 3/8″ seam allowance INWARD to the line you just drew.
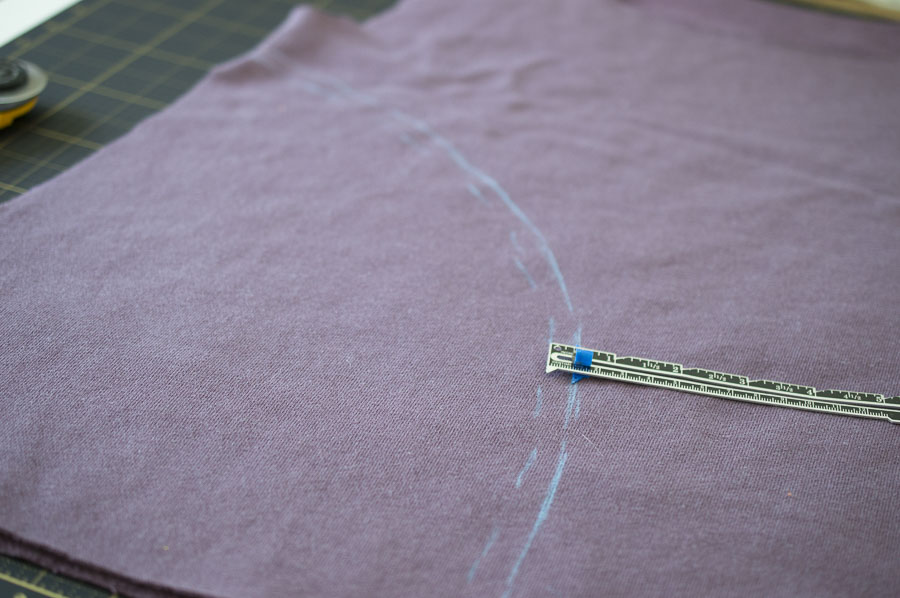
Cut along that line. It may or may not line exactly up with the side seams stitches. If it doesn’t, that’s ok. Just be sure that the side seam is stitched up the point where you have cut to make room for the rainbow.
Line up the middle notch at the top of the rainbow with the side seam and pin. Pin the rest of the rainbow in place along the edge just like you did previously.
Stitch at 3/8″ seam allowance!
Iron one you are done for a clean look.

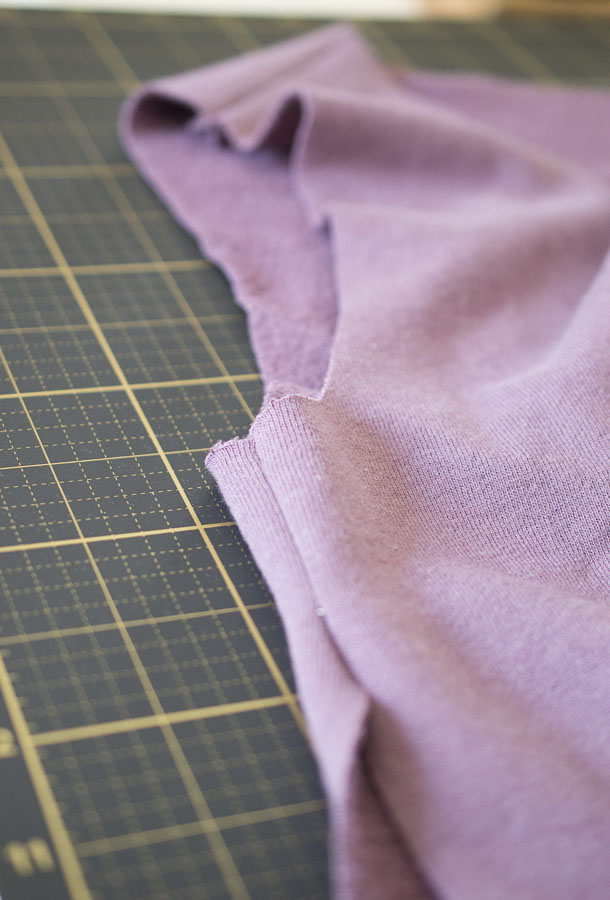
The rest is just a matter of following the pattern with ONE EXCEPTION! Because you had to stitch the side seam on one side, you will need to create a set-in sleeve for one of the sleeves. The other sleeve can be stitched as directed by the pattern.
I did not have trouble doing a set-in sleeve and didn’t even need gathering stitches for it. If, however, you are unfamiliar with them, you might find this tutorial helpful!
Enjoy living your best rainbow hippie child life!

I hope you enjoy this as much as I do. It’s just bringing some serious sunshine into my life right now!


I love this!!! How much of each fabric did you buy? I SO want to make this! Thanks for sharing!
Thank you! I grabbed 2 yards of the thistle and 3/4 of a yard for all the others but you could totally get away with just 1/2 yard of the ivory. There will definitely be leftover scraps because you need the width of the fabric!
This is so gorgeous. The colour combination is perfect!
Thank you SO MUCH! I was very happy with how it came together ❤️
I grew up in rural MN, and I’ll never forget when the local organic farmer came and showed us a video about the evils of the pesticides Green Giant used. She kind of lost us when she said her kids had to pick bugs off the plants by hand as the alternative, though. Your sweatshirt is perfect stay-at-home comfy happy!
Ha! Oh…that is a great memory Meagan! Farm life is rough, man. I remember shucking peas on my aunt’s farm and thinking I would die of boredom. 🙂