officially, kids clothes week ended yesterday. but, you know what? I am not done talking about what I made. so I plan to just keep on talking. I made everything during the week but just haven’t blogged about all of it yet. so here it is monday and I’m still blathering on about last week. deal with it!
and now I present…a short-sleeved handsome shirt!
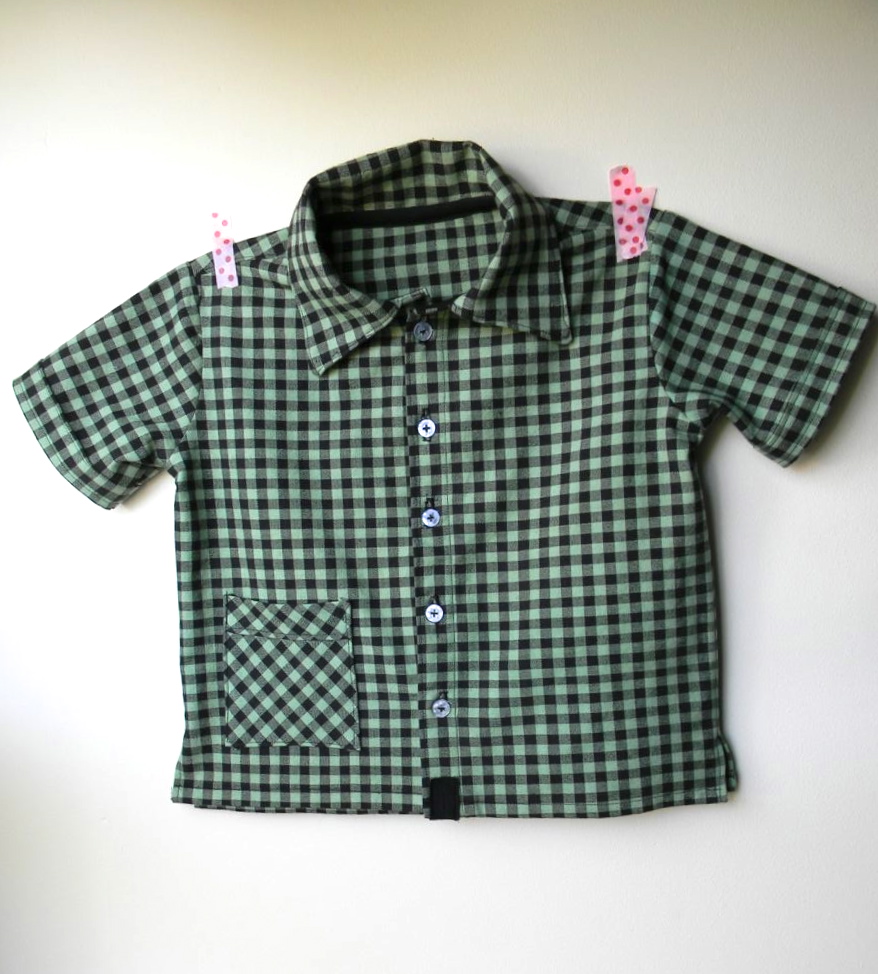 as I mentioned earlier this week, handsome shirts (or buttoned up tops to the uninitiated) are really important to C. he wears one every day. so, I knew I was going to need to make a short sleeve handsome shirt for springtime. this one has a cute little pocket, side slits, and a little bit is folded over on the sleeve, which is a nice detail. I like little details like this on kids clothes. it shows off a bit of the handcrafting effort that went into making it.
the fabric might look a little familiar and that is because it’s the same stuff I used to make his long-sleeved handsome shirt except in green. green is C’s favorite color so I bought some Rit dye and dove into my first ever fabric dying experiment. thankfully, it took the dye beautifully. I was so happy with the results. it is a great green color.
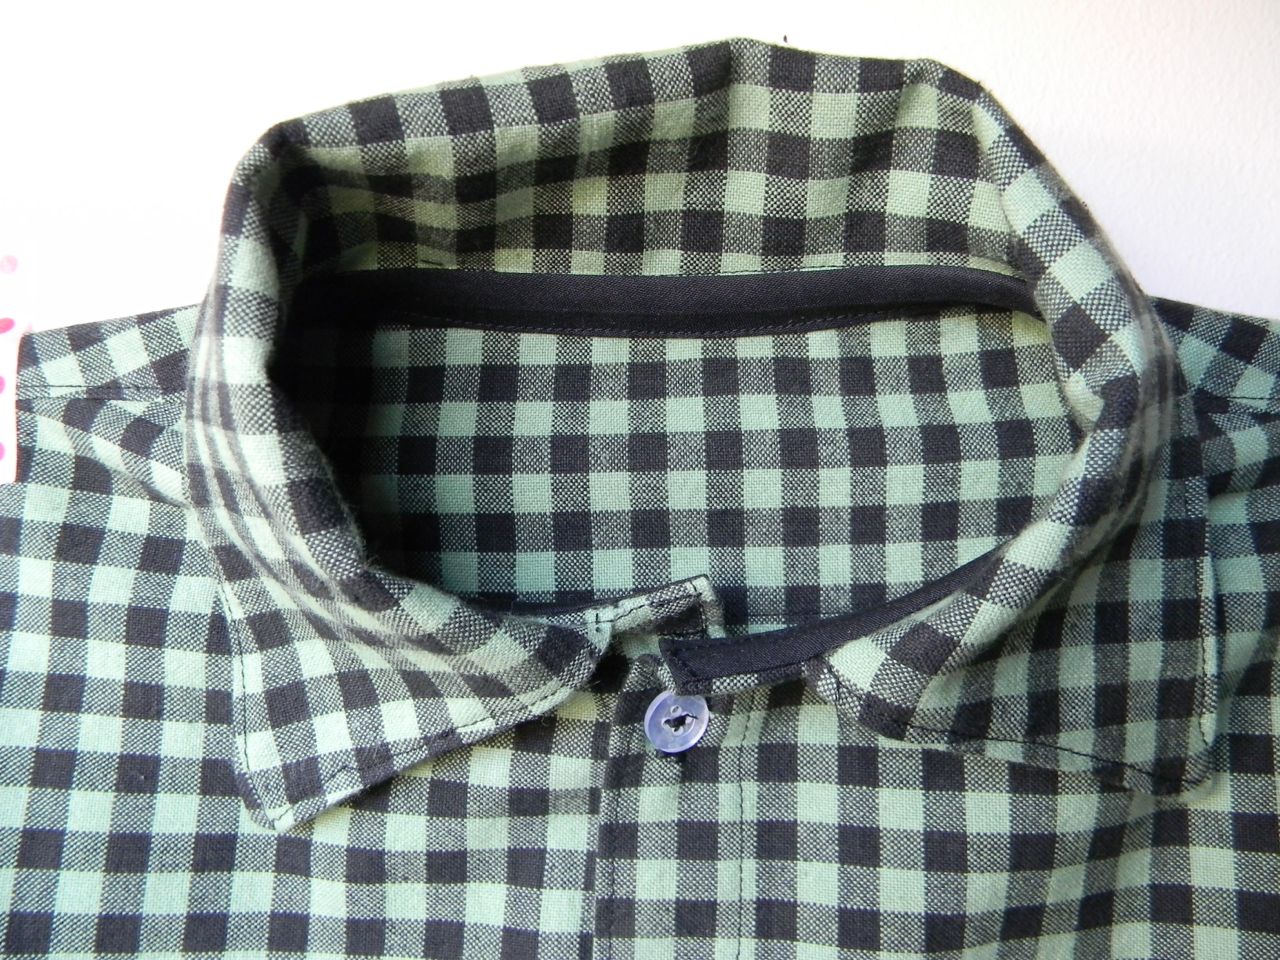
the pattern is from sewn with love (again). despite my earlier challenges with patterns from this book, I tried it once again because I had already pieced together the pattern which is no small task. there were some goof-ups and complications because, once again, the instructions weren’t particularly clear and the pictures not all that helpful.
for one, I couldn’t understand how she wanted to collar to come together and I ended up putting in some bias tape to cover up exposed raw edges. it turned out fine, I like the look actually and it gives the collar a bit of necessary stiffness. so, no big deal.
after a few additional attempts to understand the written instructions, however, I basically just scrapped it and started putting together the shirt without reading the pattern. enough of it was familiar from making the long-sleeved shirt that it came together in a logical fashion. and truthfully, he likes it! I didn’t even have to pay him..he put the shirt on voluntarily one morning.

sadly, it’s not passing the mama test because it’s a little small. given that the long-sleeve shirt was a little big this is really disappointing…wouldn’t the sizes be the same in the same book? arghh. *this book!!* (I am shaking my clenched fist at the sky like an old lady right now). he really doesn’t mind…he wants handsome shirts even if they don’t fit him. the thing is it really wasn’t my intention to sew him up an ill-fitting shirt! enough of that, I’m letting it go. (just an aside, can you tell he is hiding his sunglass under his hat in the picture? he is so proud of this trick. his hat, he calls his *handsome hat*…I know. clever name. handsome is his thing.)
I also absentmindedly added an extra buttonhole at the bottom and had to cover it up with a patch of black fabric. In the hopes it would look intentional, similar to what katy dill did here. that mistake was 100% me.
phew. warts and all the sewing is done and I’m proud of my makings. two handsome shirts and two sets of pajamas. I’m already planning for the summer kcw…essentially I will be making the many, many pairs of shorts and t-shirts I didn’t get around to last week!

I like the bias binding on the inside neck. I always have trouble with it, but yours is so even and perfect. Nice! I found the Maxwell shirt a good, basic button down that was versatile enough to turn into a bowling shirt. (However, there isn’t a long-sleeved option.)
Nice tip. I’m trying to decide if I want to buy another pattern or if now that I’ve conquered these wonky ones, I want to just stick with them and keep doing my adaptations. It’s a battle between my cheap side and my anal-retentive side. Thanks for the compliment on my bias tape! Coming from such an accomplished sewist that means a lot to me.